Introduction to version control with Git
Scientific workflows: Tools and Tips 🛠️
2023-06-15
Motivation
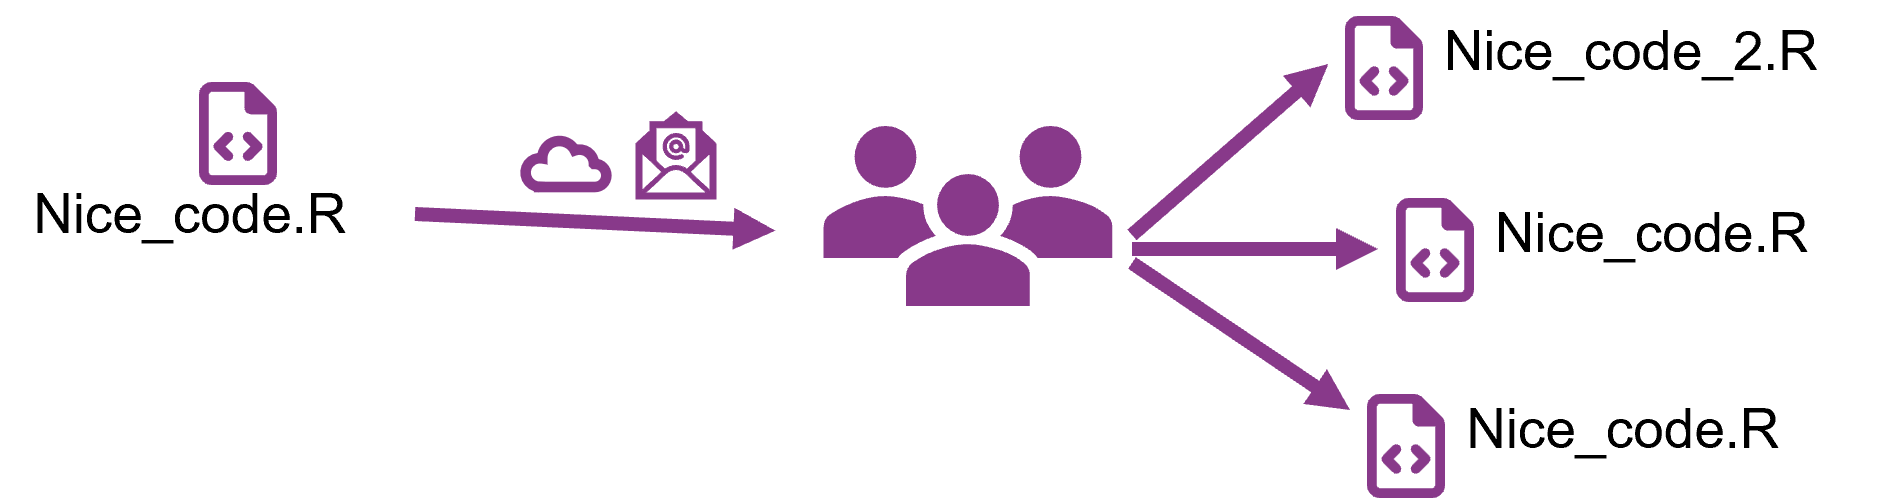
Two examples in which proper version control can be a life/time saver

Version control with Git
For projects with mainly text files (e.g. code, markdown files, …)
Basic idea: Take snapshots of your project over time
- Snapshots are called commits in Git
A project that is version controlled with Git is called Git repository (or Git repo)

Version control with Git
Git is a distributed version control system
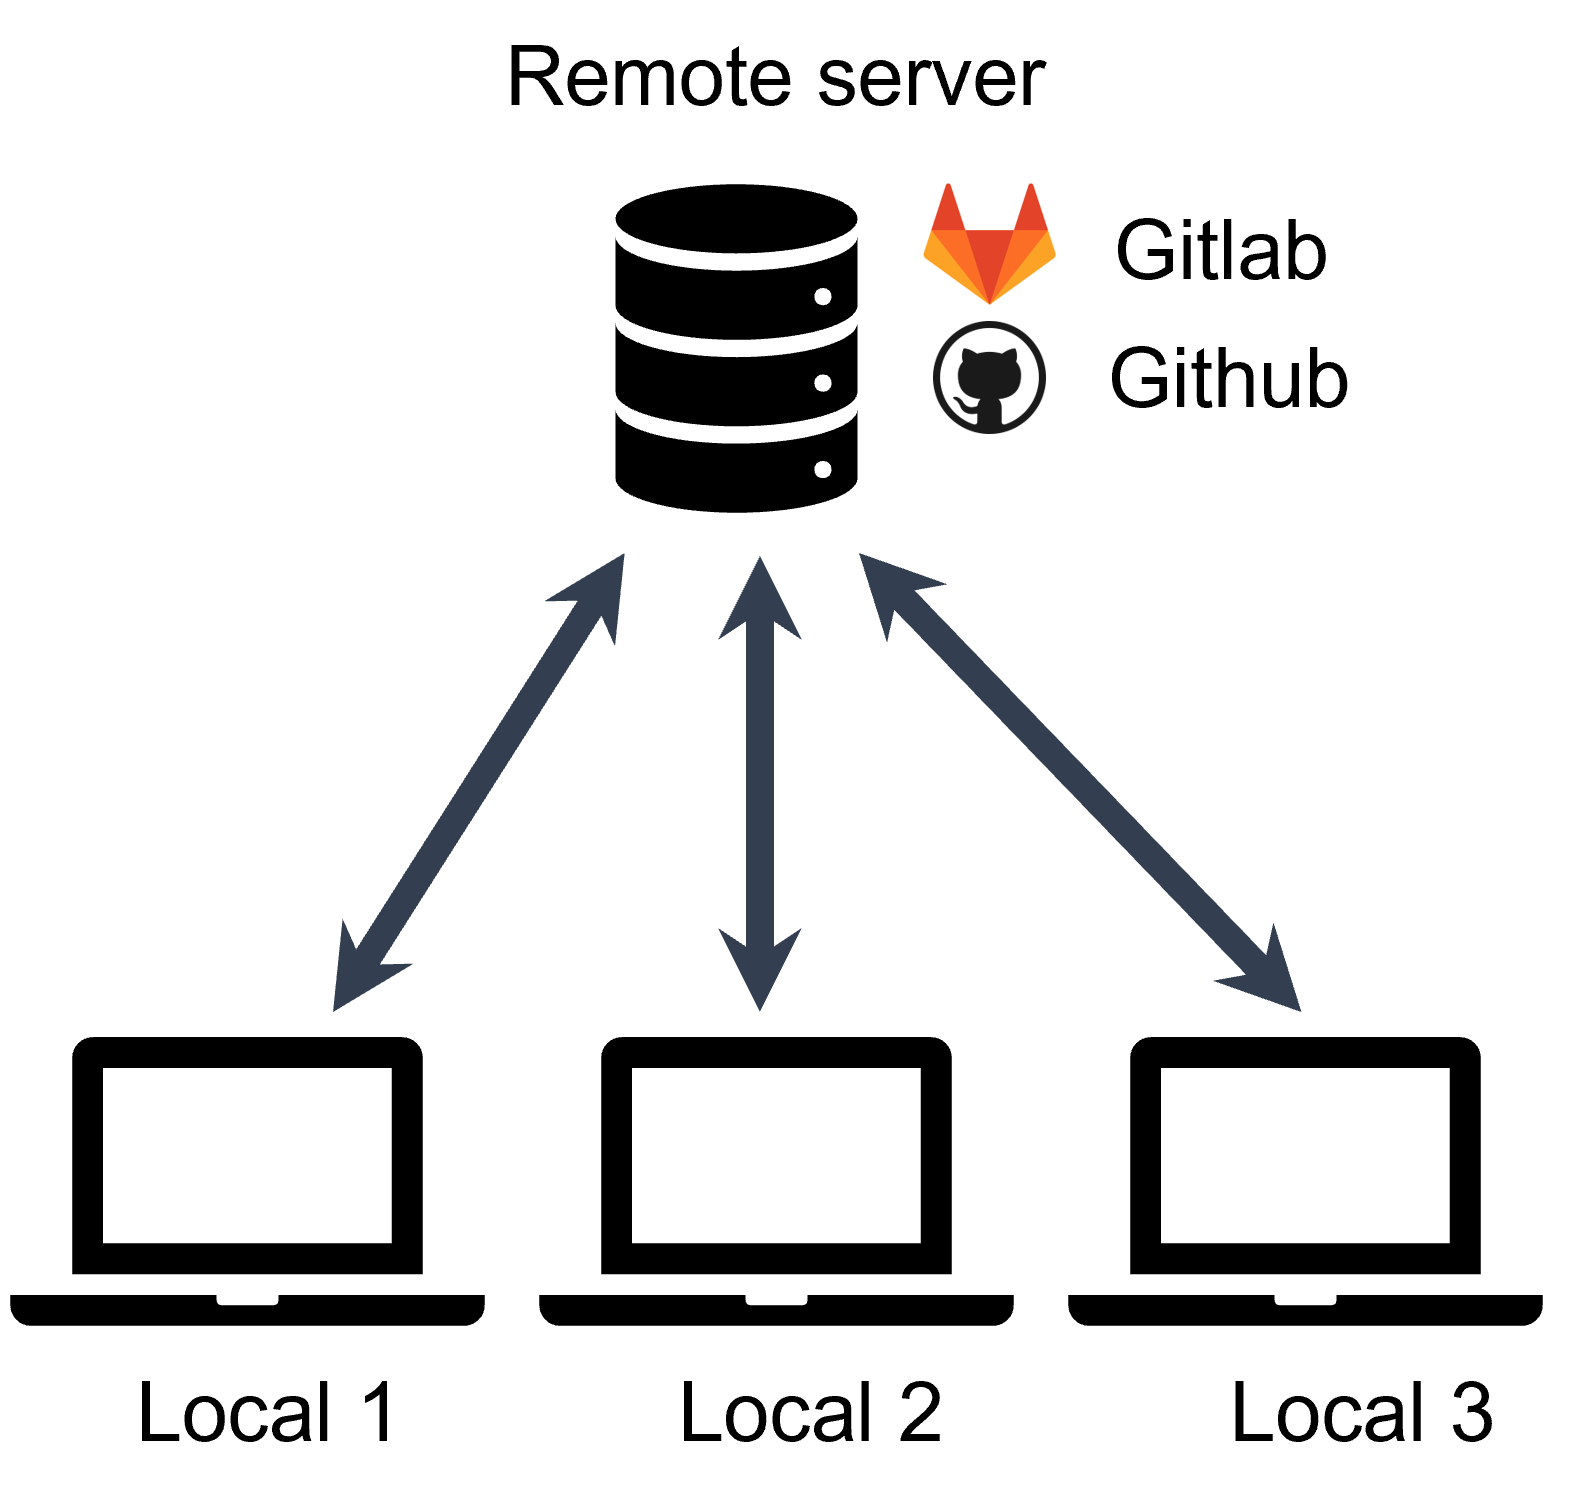
- Idea: many local repositories synced via one remote repo
- Every machine has full-fledged version of repository with entire history
How to use Git - Terminal
Using Git from the terminal
r fontawesome::fa(name = "plus", fill = "green") Gives you most control
r fontawesome::fa(name = "plus", fill = "green") You find a lot of help online
r fontawesome::fa(name = "minus", fill = "red") You need to use the terminal
How to use Git - GUIs
A Git GUI is integrated in most (all?) IDEs, e.g. R Studio
r fontawesome::fa(name = "plus", fill = "green") (Often) Easy and intuitive
r fontawesome::fa(name = "plus", fill = "green") Stay inside your IDE
r fontawesome::fa(name = "minus", fill = "red") Not universal
How to use Git - GUIs
Standalone Git GUI software, e.g. Github Desktop
r fontawesome::fa(name = "plus", fill = "green") Easy and intuitive
r fontawesome::fa(name = "plus", fill = "green") Helps with initial setup of Git
r fontawesome::fa(name = "plus", fill = "green") Nice integration with Github
r fontawesome::fa(name = "minus", fill = "red") Switch program to use Git
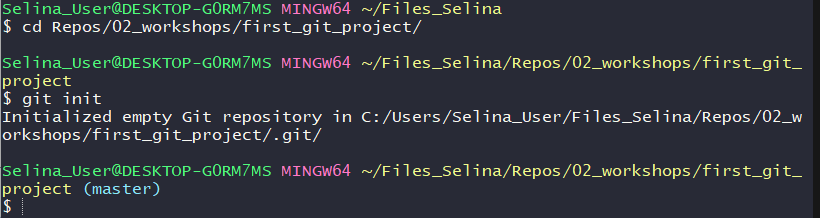
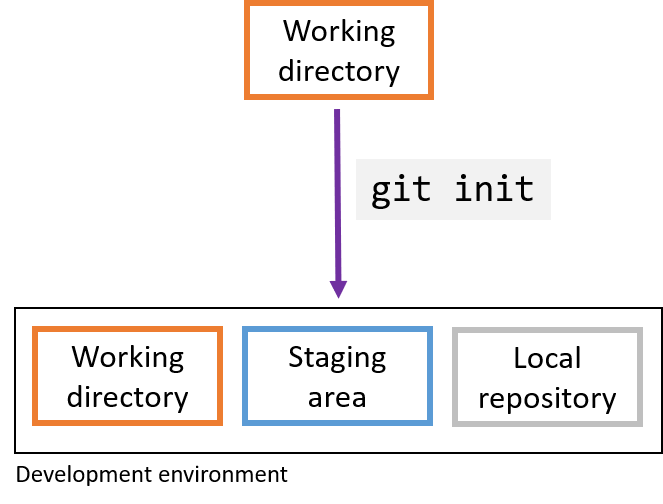
Step 1: Initialize a git repository
- Adds a (hidden)
.gitfolder to your project that will contain the Git repository - You don’t have to touch anything that is in this folder
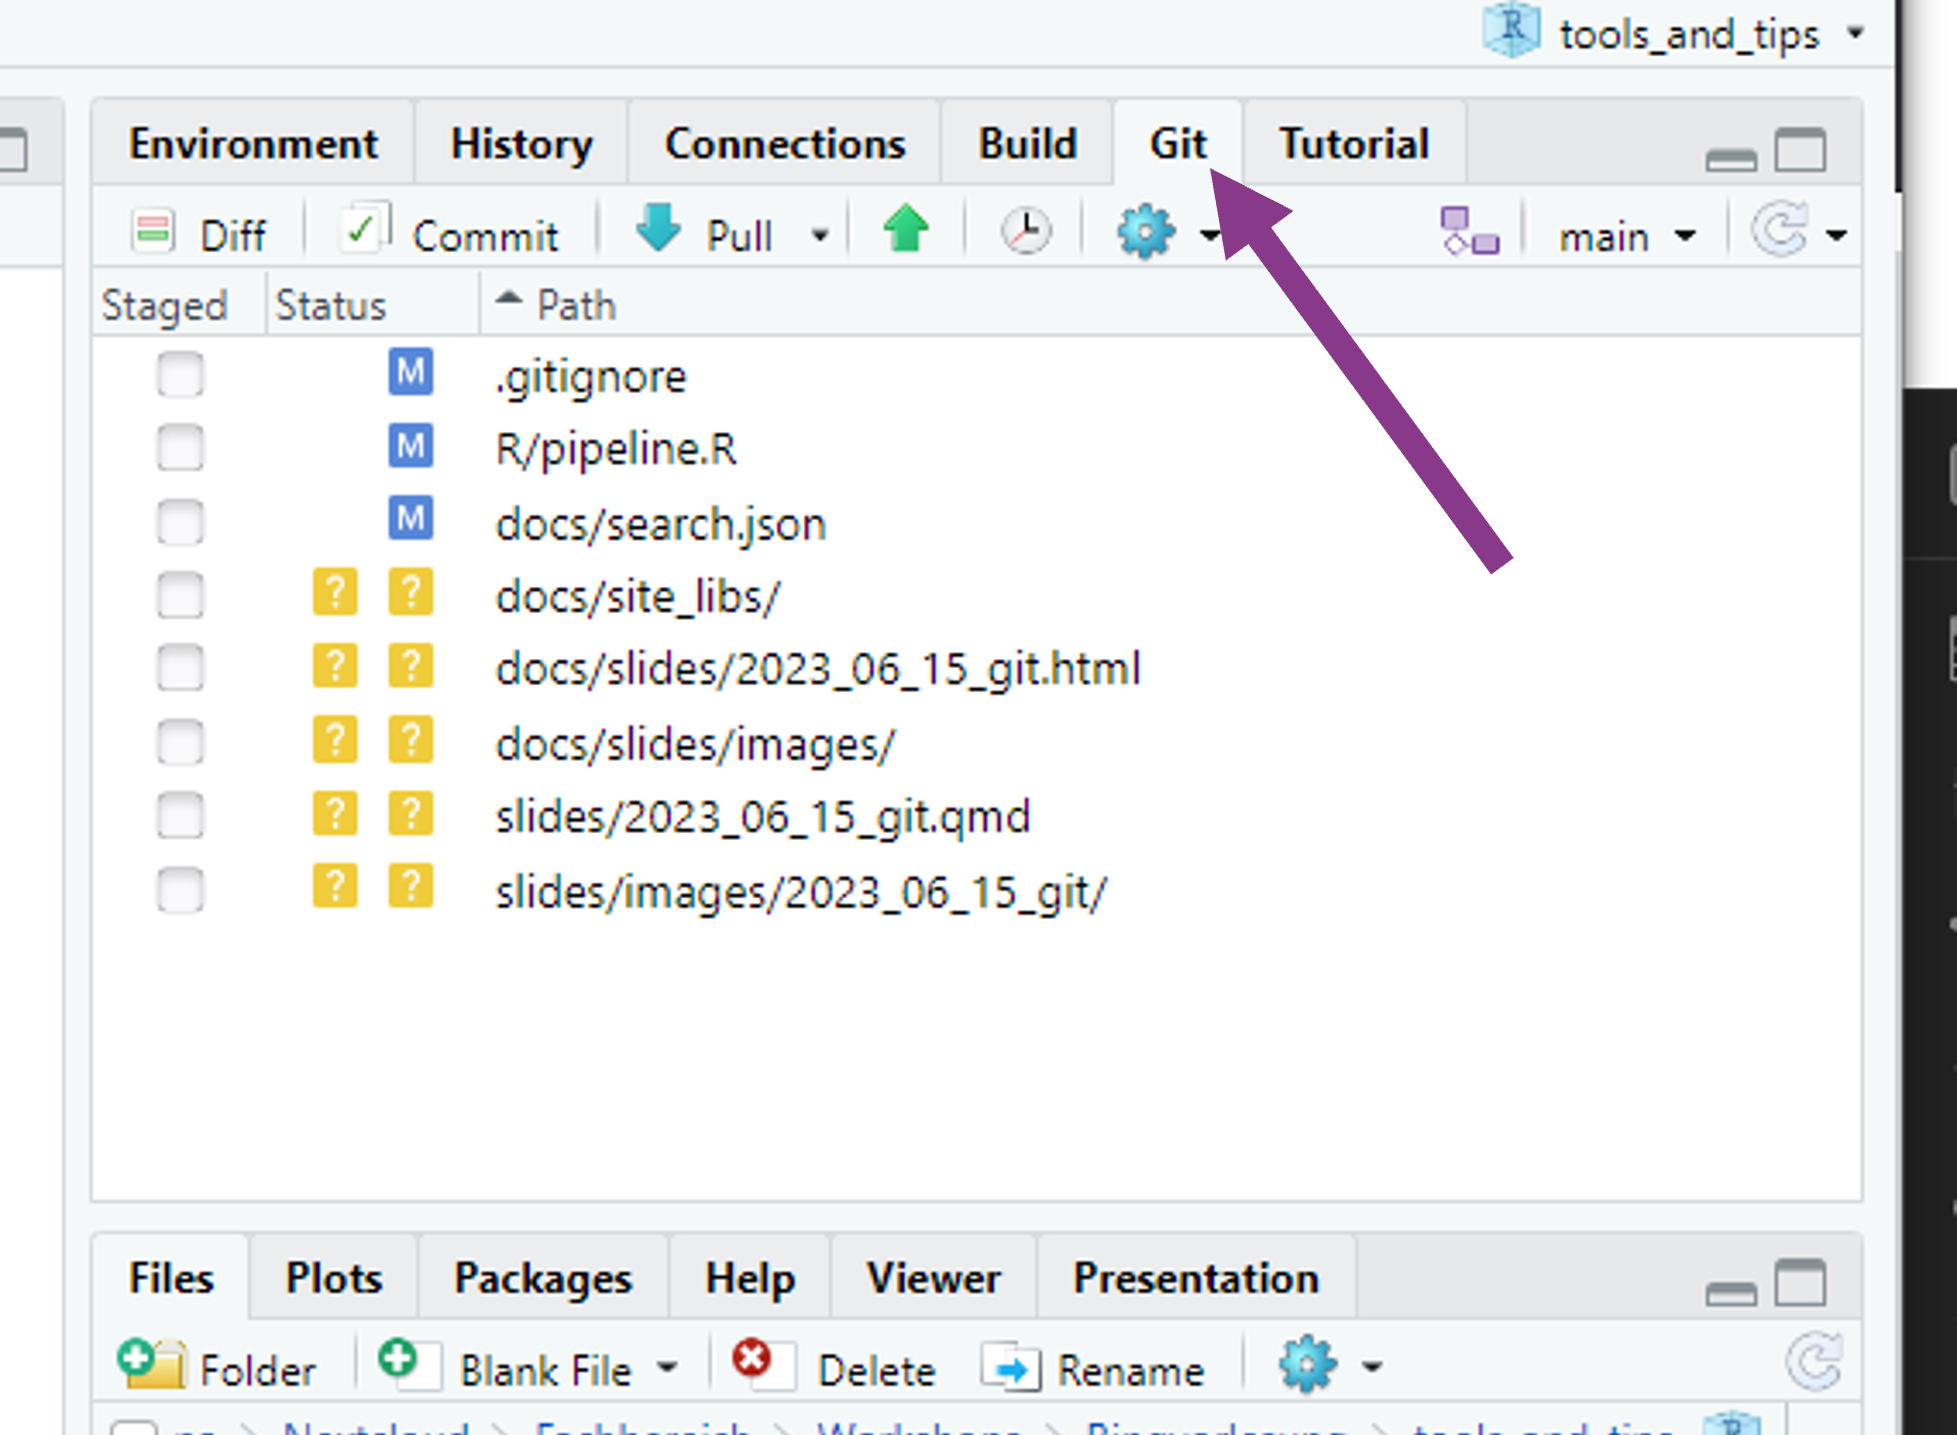
Step 2: Modify files and stage changes
Git detects any changes in the working directory

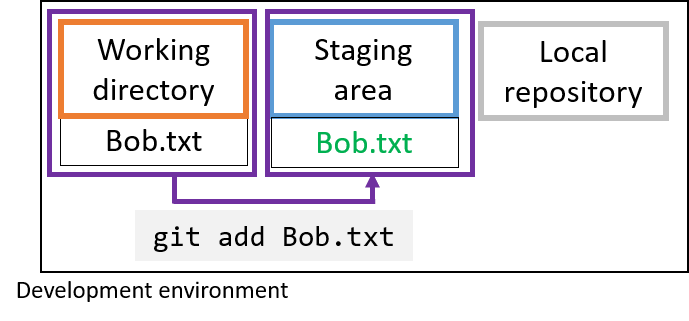
Step 2: Modify files and stage changes
When you want a file to be part of the next commit (i.e. snapshot), you have to stage the file
- In the terminal use
git add - Usually in Git GUIs this is just a check mark next to the file name
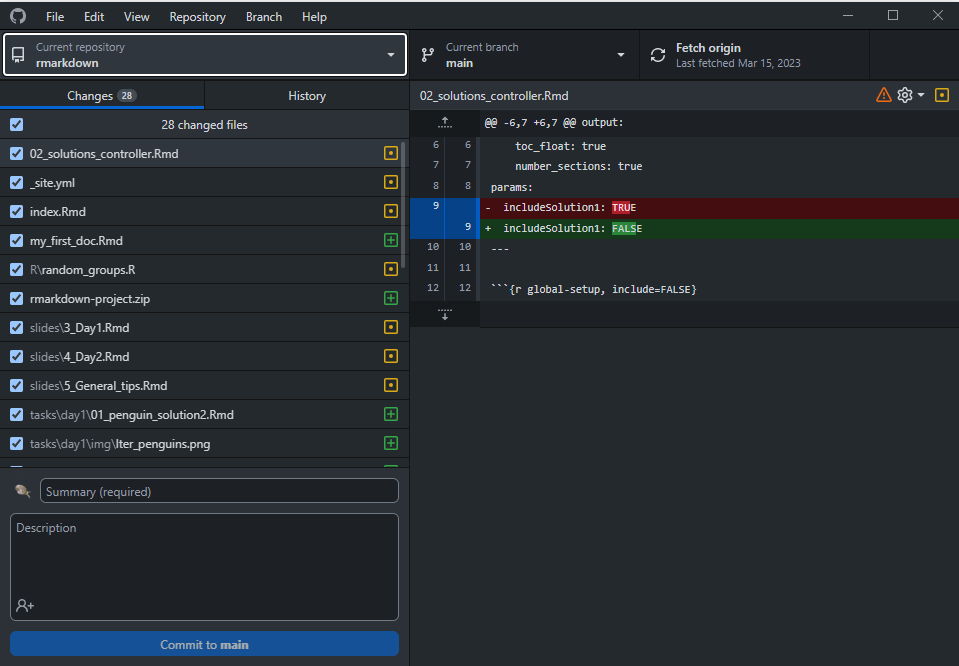
Step 3: Commit changes
Commits are the snapshots of your project states
Commit work from staging area to local repository
- Collect meaningful chunks of work in the staging area, then commit
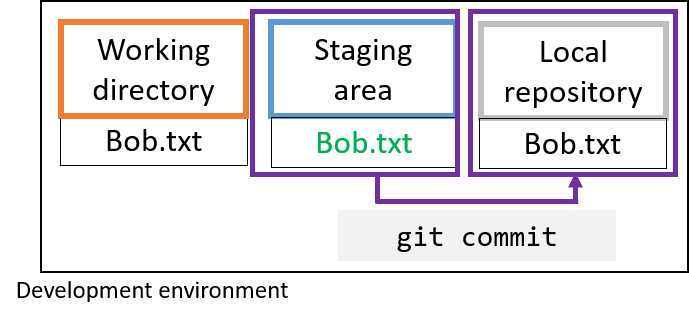
- After a commit, your changes are part of your project’s git history
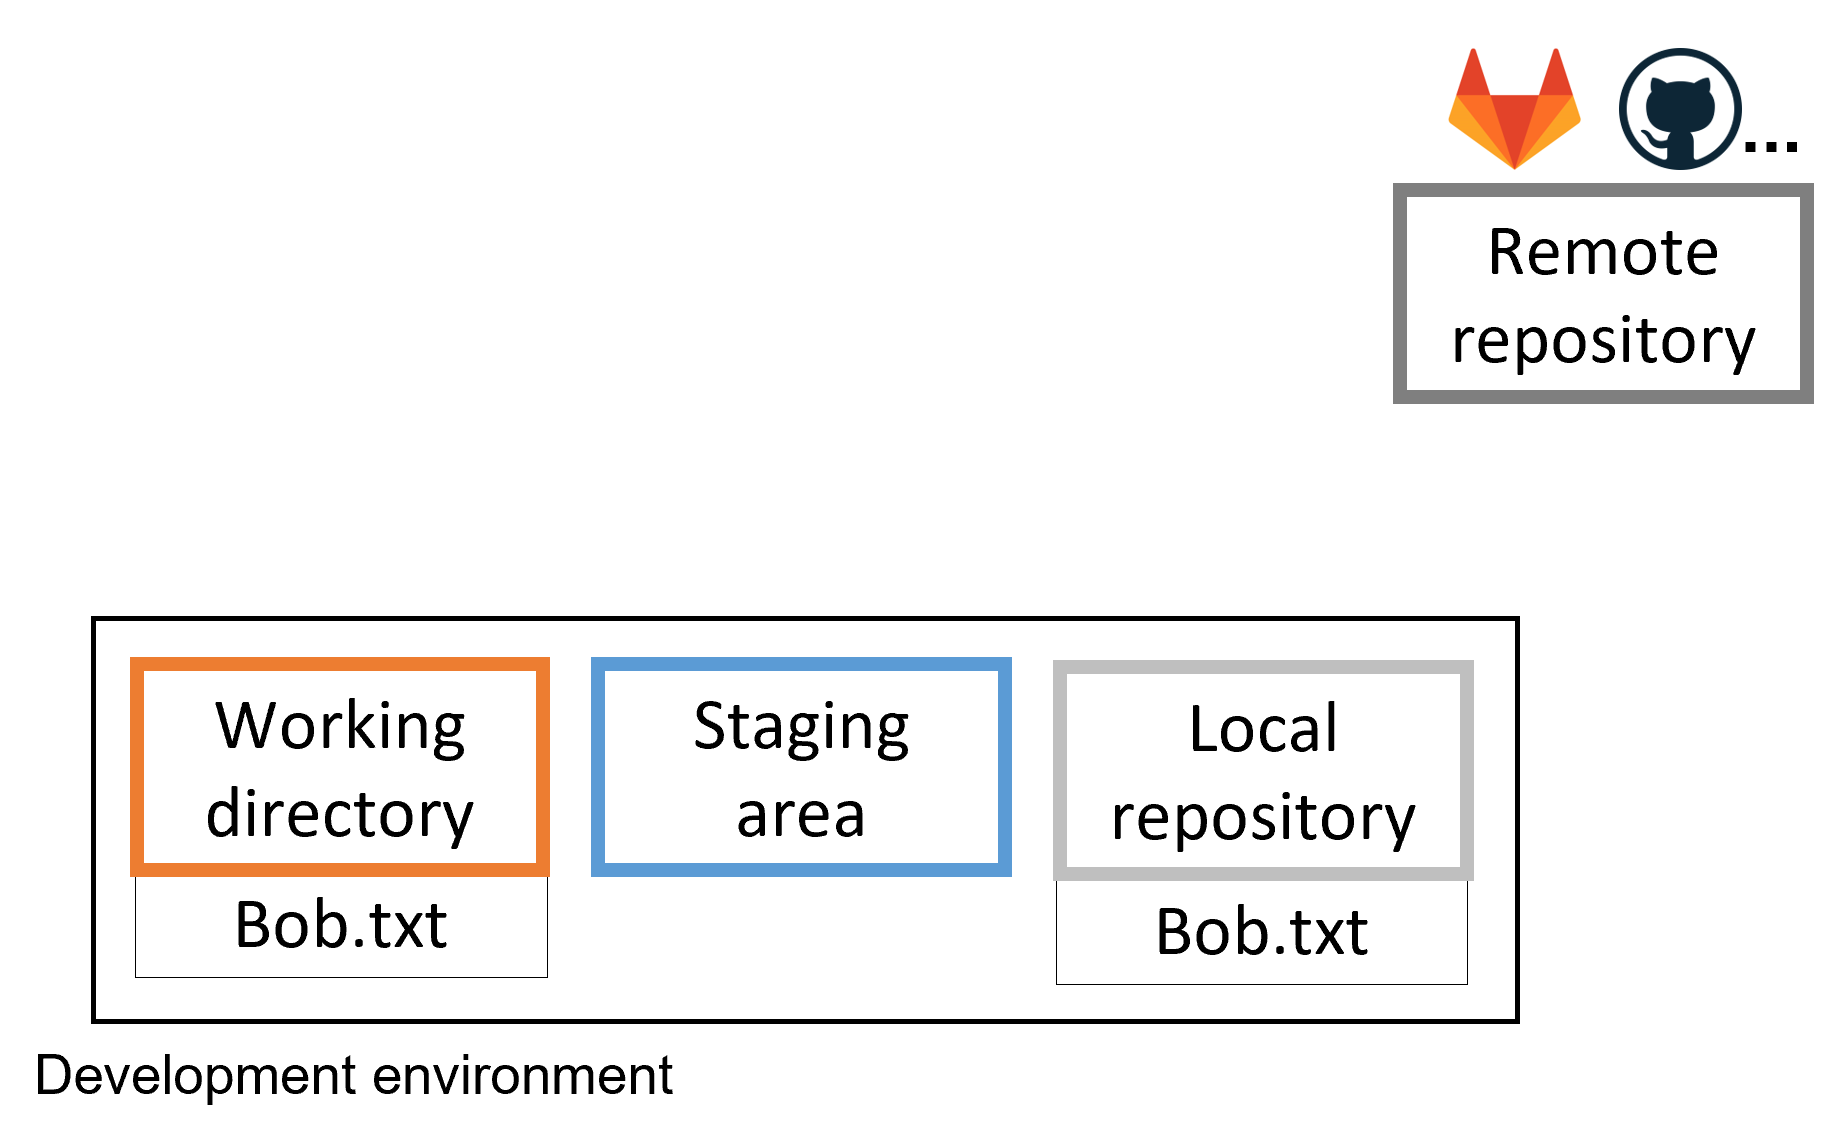
Step 4: Create and connect a remote repo
Remote repositories are on a server and can be used to synchronize, share and collaborate
Remote repositories can be private (only for you and selected collaborators) or public (visible to anyone online)
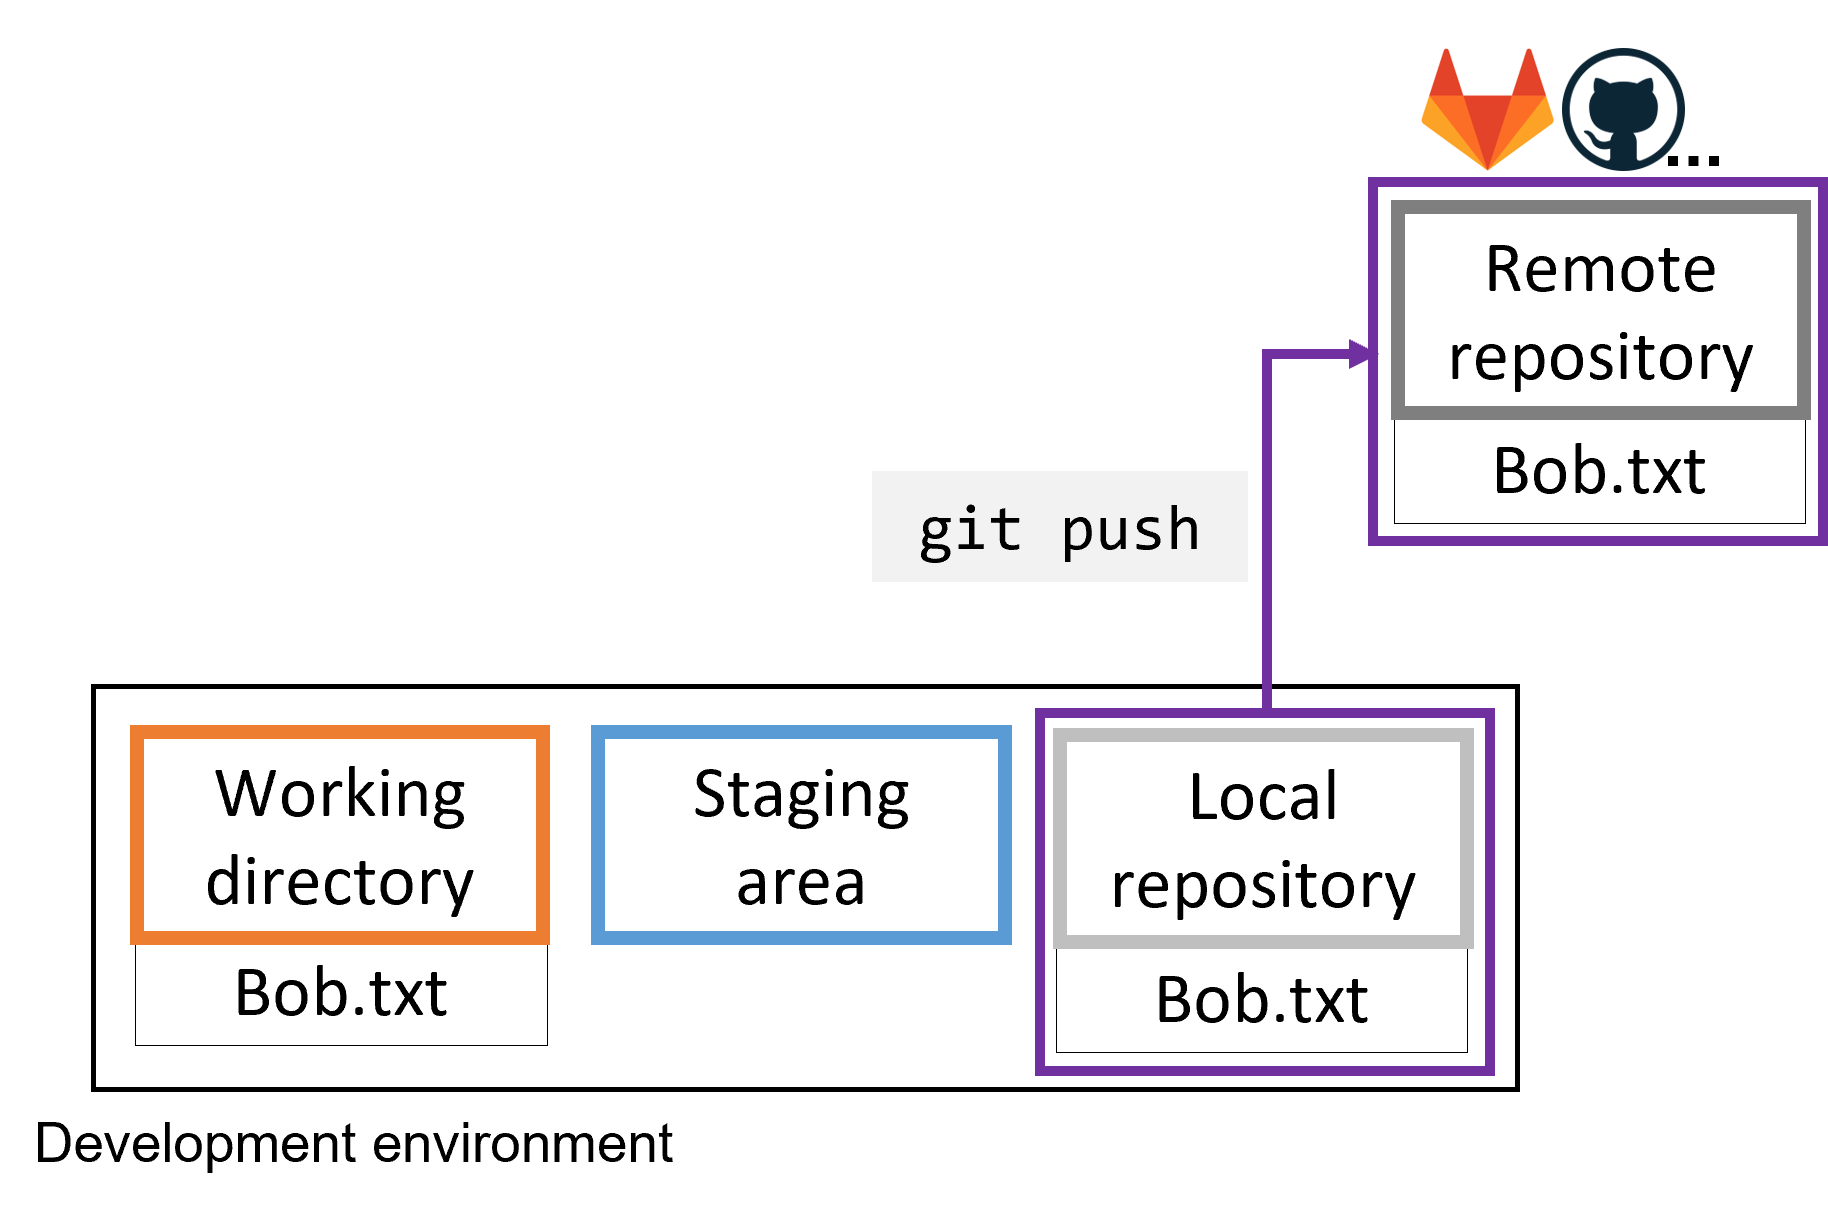
Step 5: Share your changes with the remote repo
- Push your local changes to the remote with
git push
Get a repo from a remote
- In Git language, this is called cloning
- Get a copy of your own repository on a different machine
- Get the repository from somebody else
Get a repo from a remote
By cloning, you get a full copy of the repository and the working directory with all files on your machine.
- Clone a remote repository with
git clone <remote_address>
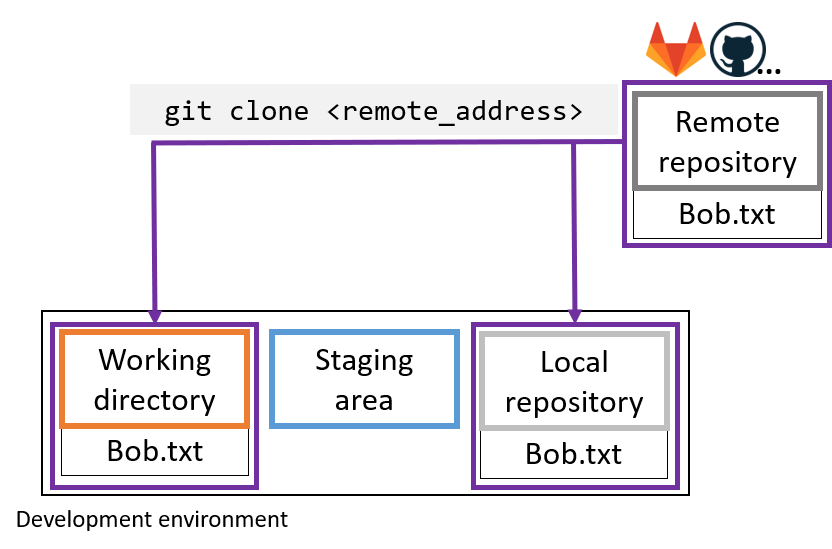
- If the clone is authorized it can also commit and push
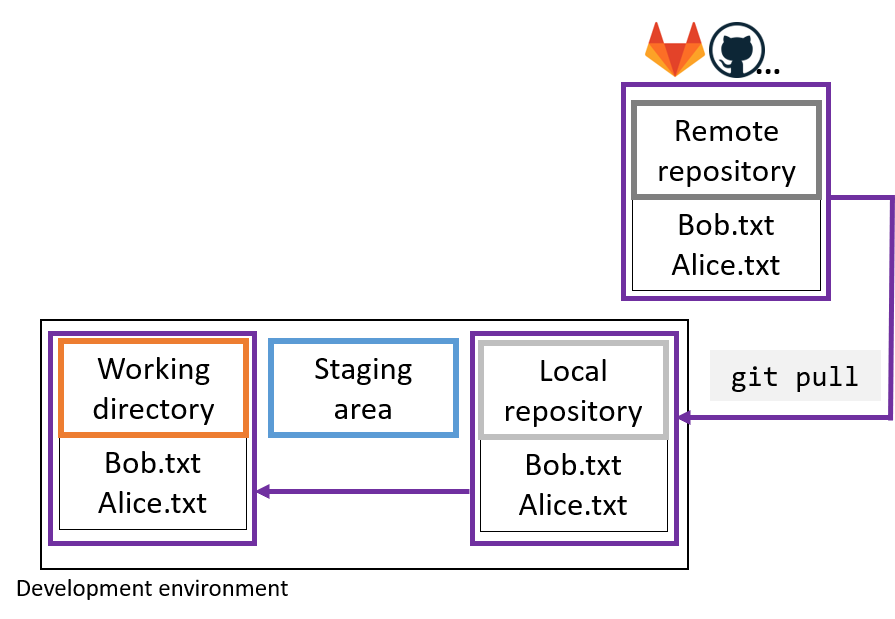
Get changes from the remote
Local changes, publish to remote:
git pushRemote changes, pull to local:
git pull
A simple collaboration workflow

- By default: Everything on one branch (main)
- Branches are connections between specific commits
- Basic idea: Pull newest version before you start working, push new version after you are done
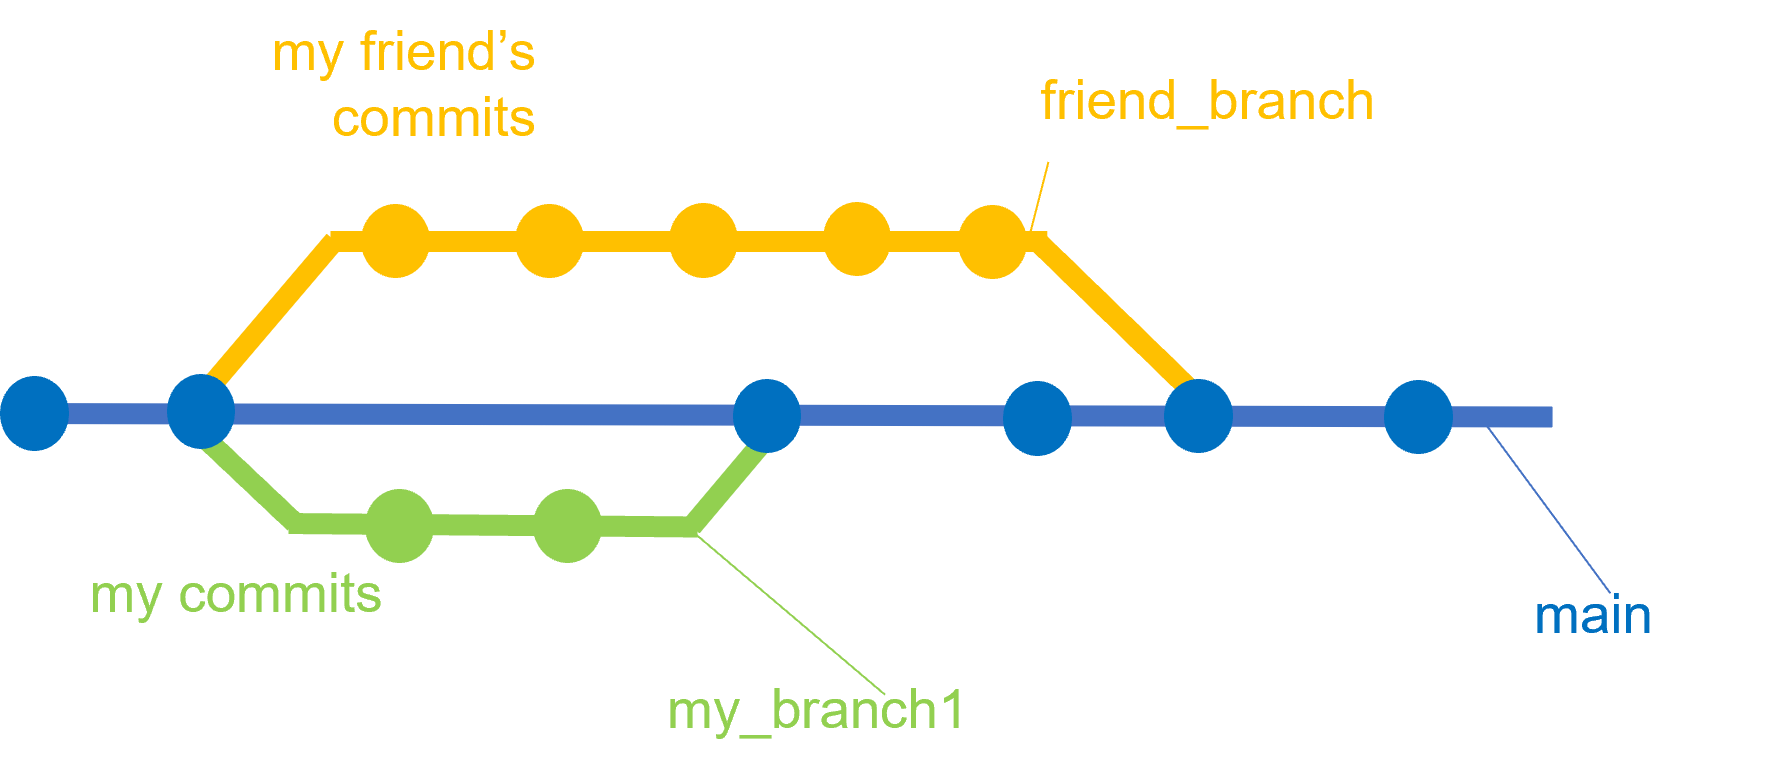
A more complex collaboration workflow
- You can also have multiple branches of the same project
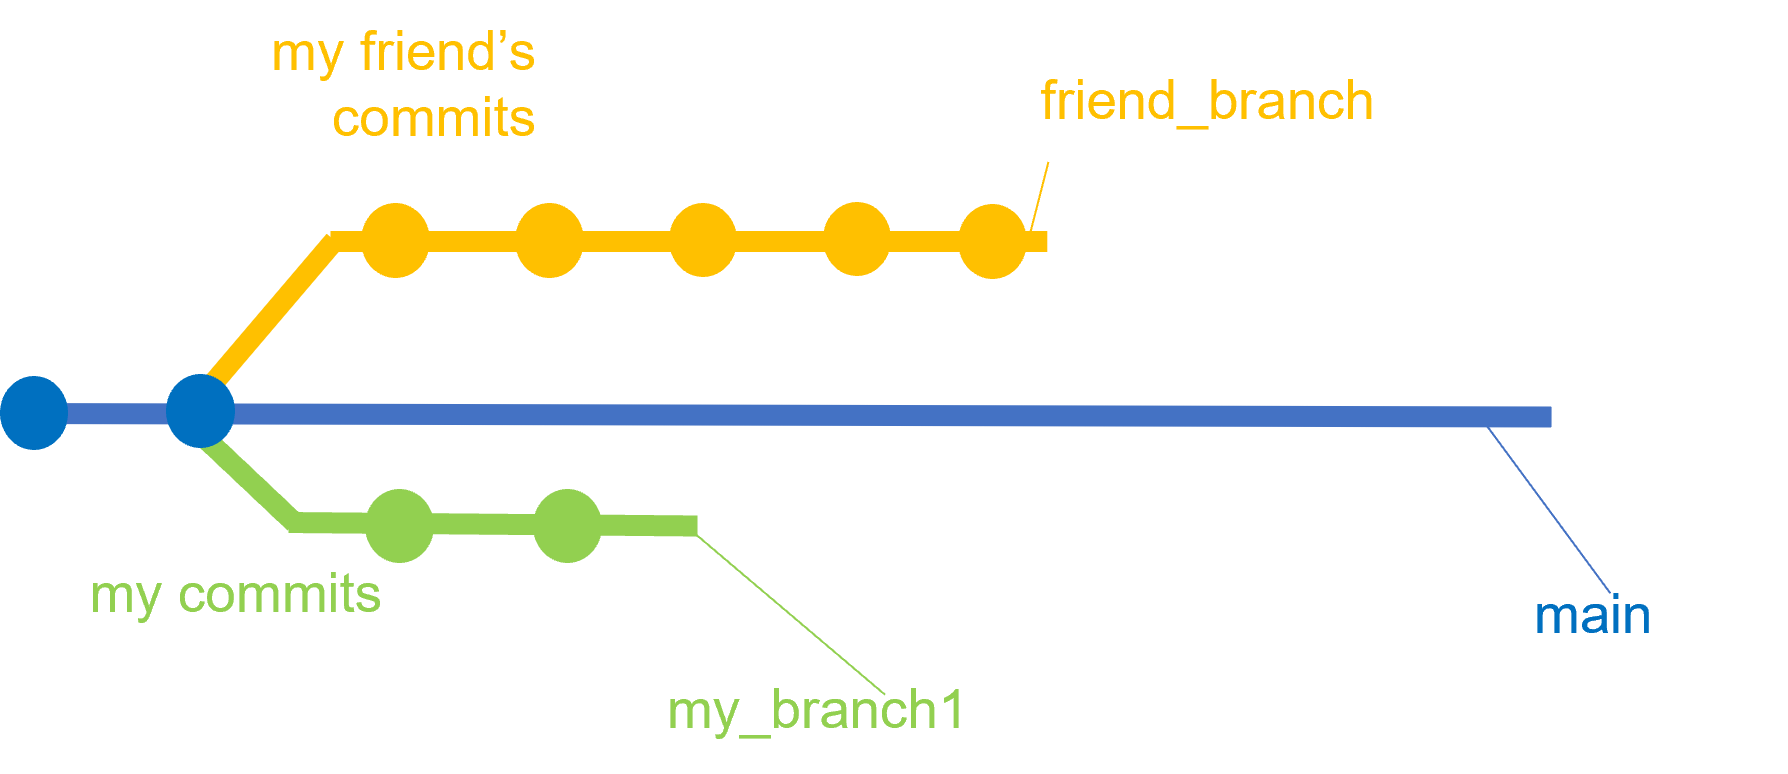
A more complex collaboration workflow
- Branches can be merged using
git merge